So you have seen our lovely bath magic spells but you cannot take a bath. Maybe you don’t have a bath in your current residence, maybe you are physically unable to use bathtubs, maybe you’re just super stretched for time but want to get in some extra magical umph. Recreational Witchcraft is here for you.
Shower disks are traditionally used in the aromatherapy world to relieve congestion and other flu-symptoms while showering via the use of essential oils, but we will be bumping up their magical potential.
Basic recipe:
1 cup baking soda
1 tablespoon corn starch
1/3 cup of water
Muffin tins and muffin liners
Glamour:
essential oil of sweet orange
essential oil of rose
essential oil of jasmine
crushed red rose petals
pinch of glitter
Combine baking soda and corn starch (making sure there are no clumps), then slowly add in the water. Fill lined muffin tins about third of the way, then add in dry herbs and spices. Leave out to dry for at least 24 hours. Carefully take disks out of the liners, add your essential oils, and place your disk somewhere in your shower that will allow them to dissolve slowly while you shower. Bam, you’re done.
This recipe is the shower version of this bath spell.
Brooms! Such an odd thing. Associated with witches, brewers, marriage, homekeeping, and a ton of other stuff.
Sometimes it’s all you can think of when you look at witches, and other times, it seems like the last thing a witch actually uses.
There’s so much lore associated with them, but the store bough, plain looking thing you can grab for a few bucks doesn’t have enough oomph does it? In case you want to make your own and have it really connect to you or your home or even at its shallowest: your style, then this post is for you.
“Corn Brooms” is a term you may have heard, but not know where it comes from. Traditional brooms are made with broom corn, a variety of sorghum (the stuff to make molasses) that looks like corn, but instead of ears, it has stalks with seeds on them that make the basis of the broom.
You can use other things to make the actual bristles of the broom, but at least a knowing the traditional components is important. Straw is another alternative as well as various sticks, herbs and flowers like lavender, eucalyptus, birch twigs etc.
One decision you should make is if it’s for sweeping, or more a symbol. That should be the determining factor of the materials used.
Above is my quick diagram of how you can simply make a broom.
Fig a. Find a stick, branch or staff the appropriate length for your purposes
Fig. b. Lay the broom corn, corn flower, cattails or whatever plant you want as the head of the broom with the length going “upwards” towards the length of the staff.
Fig. c Tie them into place with twine, ribbon, or whatever sturdy string like thing you’ve got, and it wouldn’t be a bad idea to go around the bristles several time, and put a nail into the ties to keep the bristles from slipping down once it’s completely bound
Fig. d Now that the bristles are attached, flip them down carefully to keep the bristles from breaking (you can soaks them in water ahead of time to make them more pliable). Tie a finishing string ribbon etc to keep the bristles facing downwards and trim the bristles to the length you want.
If you don’t want to invert the bristles or can’t because of the rigidity of materials, you can weave the tops with ribbon like a basket to make it more finished looking.
You can carve the handle, burn symbols or incantation depending on your purpose, stain and polish the wood, or even leave the wood raw.
Don’t get carried away, decide its use before making. If it’s super decorative, it won’t function well (say you used lavender stalks…you’ll make more mess than cleaning.)
If you soak the materials, you can add oils and extracts to scent it like cinnamon brooms sold during fall.
Incorporate your craft and traditions in the choice of materials. Birch is a common choice for various reasons (do some research), but what about using other woods like elder, blackthorn, willow etc.
If you plan on using this to clean and actual mundane uses, curing the wood, or using already cured wood, staffs, canes etc will save you a headache. With use and time, uncured wood may split or splinter and render it a mess that you need to sweep up with a different broom.
Good luck! I’ll post a follow up with some history and lore of brooms soon!
🦇Cheers, Barberwitch
Show support! Ko-Fi /PayPal! It would mean a lot, and any amount helps.
Original content of this blog is licensed under a Creative Commins Attributution-NonCommercial-NoDerivatives 4.0 International license
With Fall in full swing, it’s the perfect time to start gathering supplies to make a broom. Plenty of sticks are drying and falling, branches for handles and the cooling air makes moving indoors to craft even more enticing.
My coven is getting ready for our Witches Ball for Samhain and one thing we’re doing is a ritual with brooms! I mentioned that i was planning on making one this past weekend, so thank you @teaspellsandsecrets for suggesting we meet up so I could explain how if anyone had any questions! We ended up at LA Pagan Pride with our supplies and @dylanstarottemple helped me by holding twine and stalks when I needed. It was a fun time and after everyone left, @sarageralds and I walked the booths one last time and everyone asked where we bought them so a nice little ego boost there where strangers want your stuff.
Fig B. Lay the stalks length facing up. I tied these black tail wheat stalks in small bundles of about 5-6 using a continuous string of burlap.
Fig C. Instead of a nail, I carved a small divet and tied twine in it to make my anchor.
Since all the bundles were tied and connected, it was pretty easy to wrap them around the birch rod and tie off the the anchor piece.
Fig. D Start folding down the branches etc down from outside in. Smaller sections will help them from snapping. Soaking them is also a big suggestion. I only got to soak these for about 3 minutes in a lagoon before I made this and longer would have made this easier, but I’m still happy with it. Bend the first layer down around the whole broom, and if there are any gaps, you can bend the branches to cover those a bit in the next ring. Continue until all are facing down and tied them off with more twine.
You want at least one section near the top, and another near the edge of the pole to keep them all facing in the right direction.
Optionally, you can spread the branches a bit and loop them off (similar to fig B) to make a flourished broom, rather than a straight stack. That’s what I did, and here’s my Quartz capped Birch broom with black wheat bristles.
I’ll probably add something where the birch meets the bristles since it’s so thick, and maybe a few other things before the ball to really just make it mine. But here is my quartz tipped birch and black wheat broom. Measures a bit longer than 6 feet from tip to tip.
The afternoon began with wild collecting for my besom.
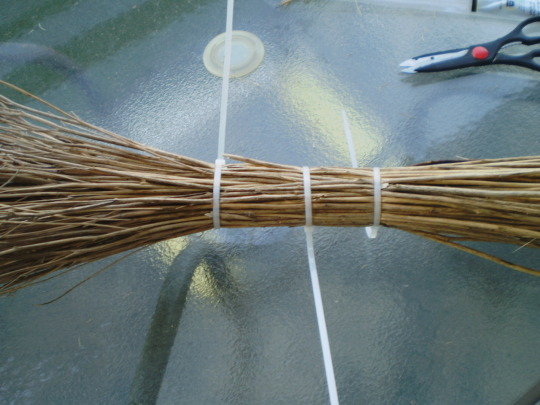
After soaking the bristles to make it easier to tie them in a bundle, it was time to assemble them.
Plastic ties made the job relatively easy. I then wound wire in between the gaps beside the ties, tucking the ends of the wire into the bundle. Then I cut the ties carefully away so as not to cut the bristles. Finally, I wet some twine and tied that around the bundle, evenly spaced. I found a branch already cut and whittled at the ends in the woods by the river, it was as if someone had played around and fashioned a sort of spear with it and then just left it there! It made for the perfect handle for my besom. Jammed that handle in the middle of the bundle hard, and that sucker isn’t going anywhere!
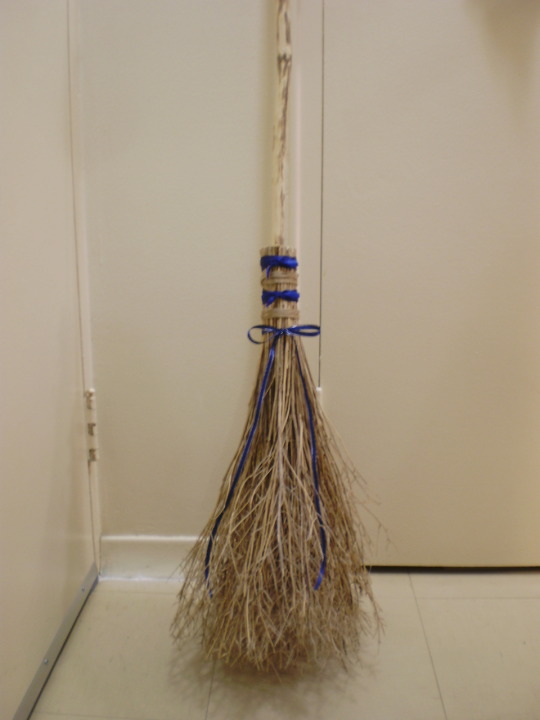
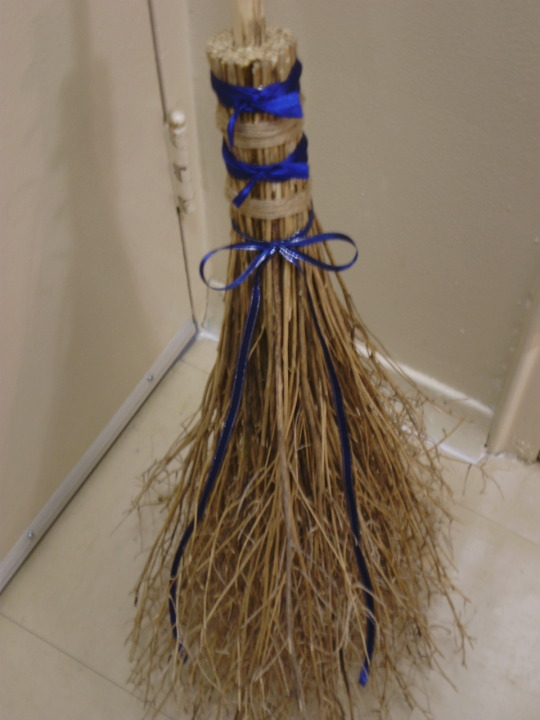
I put blue ribbon over the wire to make it look pretty (I think my Goddess likes blue, as it comes up a lot in different things lately) also, dammit, if I am going to own a besom, it is going to look pretty because I deserve it! Cost of my besom? $4.00 for plastic ties and ribbon from the dollar store, that’s it! And of course, the time that it took to gather the bundle from the wild, and search for a handle, all in all it took roughly 2 hours. Not too shabby, if I say so myself.
Now I just have to cleanse the besom (with some sandalwood incense) and ask the God and Goddess to bless it.
I feel it’s relevant for Wiccans and Witches to know you CAN make your own broom at home with just a few things collected from nature. No, you don’t have to be very good at putting craft projects together, and this honestly was very easy to assemble.
It really bothers me when I hear of others involved in the craft who have literally spent a couple hundred bucks easy on a besom/broom they bought online. Unless you WANT to spend that money because it saves time, etc., fine. But otherwise, I feel you are being taken advantage of because no one has told you the steps to make your own.
You will need:
Twigs, straw, whatever for the bristles
Long plastic ties
A small hand saw, or as in my case I used a bread knife to cut the grassy-like straw
Craft wire
Scissors or garden clippers to cut straw/twigs
Branch for the handle
Blade to whittle point in the branch
Twine
Ribbon
If you have ANY questions, please message me. It must be mentioned, this was the first broom I’ve ever put together, so if I can do it, you can too.
I want to teach you all how I make my fabric poppets, and how you can make your own too. Here is my post detailing all of what I do to make my adorable plush fabric poppets.
I also sell them if making them yourself is too much fuss for any reason. Here are details.
——Supplies——
– Fabric of your choice- My fabric of choice is fleece. The fabric should be a color you can match with your intent, personality, etc.
– Person-shaped pattern to trace- You can use a gingerbread man cookie cutter to make your paper pattern, free hand, or if you like you can use mine which I will gladly sell you a copy of- message me for details.
– Needle and thread- You can use different thread colors for different intentions.
– Stuffing and any extras- herbs, objects, etc.
– A marker of a similar but darker color than the fabric
– Scissors
-Step 1-
Lay out your fabric. Lay down the poppet pattern on the fabric. I prefer to weight them down with rocks so they don’t shift. (You can of course choose rocks that match your intent.)
-Step 1.5-
I then trace the patter with a maker that is of a similar color to the fabric, but off enough that I can see it. Don’t worry about being super clean with your lines because they will be hidden in the inside seams.
-Step 2-
Next, to sew the pieces together. Place them together so that the side with the marker line faces out.
Then, grab your needle and thread. Thread your needle.
Be sure to have a piece of thread to work with that is about as long as your arm. This should be enough for the whole poppet, but make sure to have more on hand just in case.
-Step 3-
Start your sewing in the place where the opening will end later. I typically choose the “armpit” of the poppet because then the opening gives me great access to all of its insides for later.
I use a kind of slip stitch for sewing. Really any stitch will do, but I will show you mine. I put the needle all the way through both pieces of fabric to make a loop, and before tightening I stick the needle through the loop, then tighten. This makes a kind of knot that is durable and nice looking. Here’s a picture:
Aside- Why I hand sew- I find the process of hand sewing to be not only relaxing but also more magical. I can focus on my intentions while I sew, and with each stitch I’m fastening my energy into it. This is by no means the only way you can sew them together, but it is my personal preferred way.
Continue sewing around to join the two pieces of fabric. **Remember to leave a 1.5in opening! Also leave your thread attached!** This is the only way to turn it inside out and hide the seams.
– Step 4-
Turn it inside-out. Reach inside and grab the top of the poppet’s head and pull it through the hole like shown. You may need to poke around a bit to make sure everything is fully turned right-side-out.
-Step 5- Once right-side-out, your poppet is ready for stuffing. Start with the appendages first, that way you can make sure they are well-fluffed. After that, if you want add in balls of stuffing in the places of major organs to make it more human. (A ball for a brain, a ball for a stomach, that kind of thing)
If you like, add in herbs or objects for your intent, or keys to link the poppet with the person that you’re targeting. Consider positions of the objects and herbs inside the poppet and the significance. I added rose petals in the head and heart of this one, and mint and rosemary in the stomach. That gives it some symbolism, and what witch doesn’t enjoy symbolism?
-Step 6- When it is stuffed to satisfaction, sew up the opening with the same stitch we sewed with before flipping it. This leaves a rough edge, and I actually like it that way. It makes it easier to cut open the stitching if you ever wanted to for any reason. I can’t be the only person that’s wanted to rip someone’s stuffing out (there’s a curse idea) so I hope you find it useful too.
Do a couple more stitches to assure your thread isn’t going anywhere and then cut it off.
Ta-da! A perfect poppet for all of your witchcraft needs.
Another small fun project for recycling! These are perfect for little gifts and a cute way to send your jewelry to customers… it not only give a nice shell of protection to the treasures you put inside, its cost free, customizable and keeps recycling on the mind ❤
All you need are – toilet paper rolls – decor ( i used stamps) – Tape or glue
Step one: decorate your roll. I used some of my stamps, but don’t limit yourself to just that… you can use old paper, photographs, tissue paper, paint,sharpie and whatever else you have laying around to decorate. Mod podge and some pattered paper would be fun!
Step two: Once your roll is decorated to your liking, fold down the corners on one end, making it look like little cat ears. Make sure they fold over each other so there is no open gap, and tape down ( you can also glue the end down) * side note… if you dont like the look of regular tape, they sell something called washi tape? that comes in all sorts of amazing patterns!
-Step three: When you have some side sealed and taped down, wrap and place your item/treasures inside the box ( i wrapped up some earrings) and seal the other end, again making sure they fold over one another so there are no gaps.
– Step four… your done!
Again these are wonderful for gift giving and product packaging. Small, sturdy, cheap, recycled pill boxes…. you can use old paper towel rolls too! those are larger and can fit a bit more than TP rolls.
Holy crap I wanna do this.
This is actually great if you have a jar spell that gets buried! It’ll decompose rather than glass that will just take up space and turn into trash overtime. 🙂
I just made some offering boxes to put into the wickercreature at Castlefest, so I wanted to share some ideas! I had this idea for a while and finally found some time and energy to make some.
What you need:
🔥 Pretty patterned paper (I got some paper blocks from the dollar store)
🔥 Spell ingredients/Offerings (anything goes as long as it burns)
Find a favourite tutorial for an origami box online. I used this one. And fold your pretty papers into a box. If you want, decorate the box a bit more. I made three: one for the Goddess Baduhenna, one for Nehalennia and one for the Horned God. I designed bindrunes for them and put them on the bottom of the boxes.
I got some fresh flowers from my garden and wrote down some poems (and made my own) to dedicate to the Gods. Then I added some herbs, lots of Marjoram as a taglock (my name means Marjoram) and even a bit of my favourite perfume. I wanted to make it as personal as possible.
Now simply close them and tie them shut. I used wool in the colours that matched the deities I’m making them for. I also tied some pretty flower to the top!
And there it is! Now my boxes are ready to be sacrificed! Of course you can substitute any offerings by spell ingredients to make it into a spellbox! Have fun, and as always, feel free to tag me when you make these! 🌙
Great idea! If you use the right kind of paper and string, these would even be biodegradable for burying.
One of the hardest, but possibly most fun, ways of being a Surreptitious Solitary is trying to find ways to practice out in the open without anyone knowing. I’ve been wanting to do a witch’s ladder (sometimes called pagan prayer beads, witches rosaries, etc.) for some time. If you don’t know what a Witch’s Ladder is, there are a few articles out there, but the summary is: it’s knot and nature magic mostly intended for protection.
Generally, they’re made of string of different colors corresponding with protection (or whatever you’re making the ladder for), and natural items like feathers, sea glass, shells, stones, etc. Sometimes charms or taglocks can be incorporated. If you look on Etsy there are some really pretty ones out there.
As I researched them, I wondered how I could incorporate this crafty craft into my daily life. And I kind of came to the conclusion that I don’t have to have a big rope of feathers and rocks hanging outside my door to do it: I can make something to wear that would protect me wherever I go!
I debated for some time whether to make a bracelet or necklace, but I liked how the numbers and measurements worked out on a necklace.
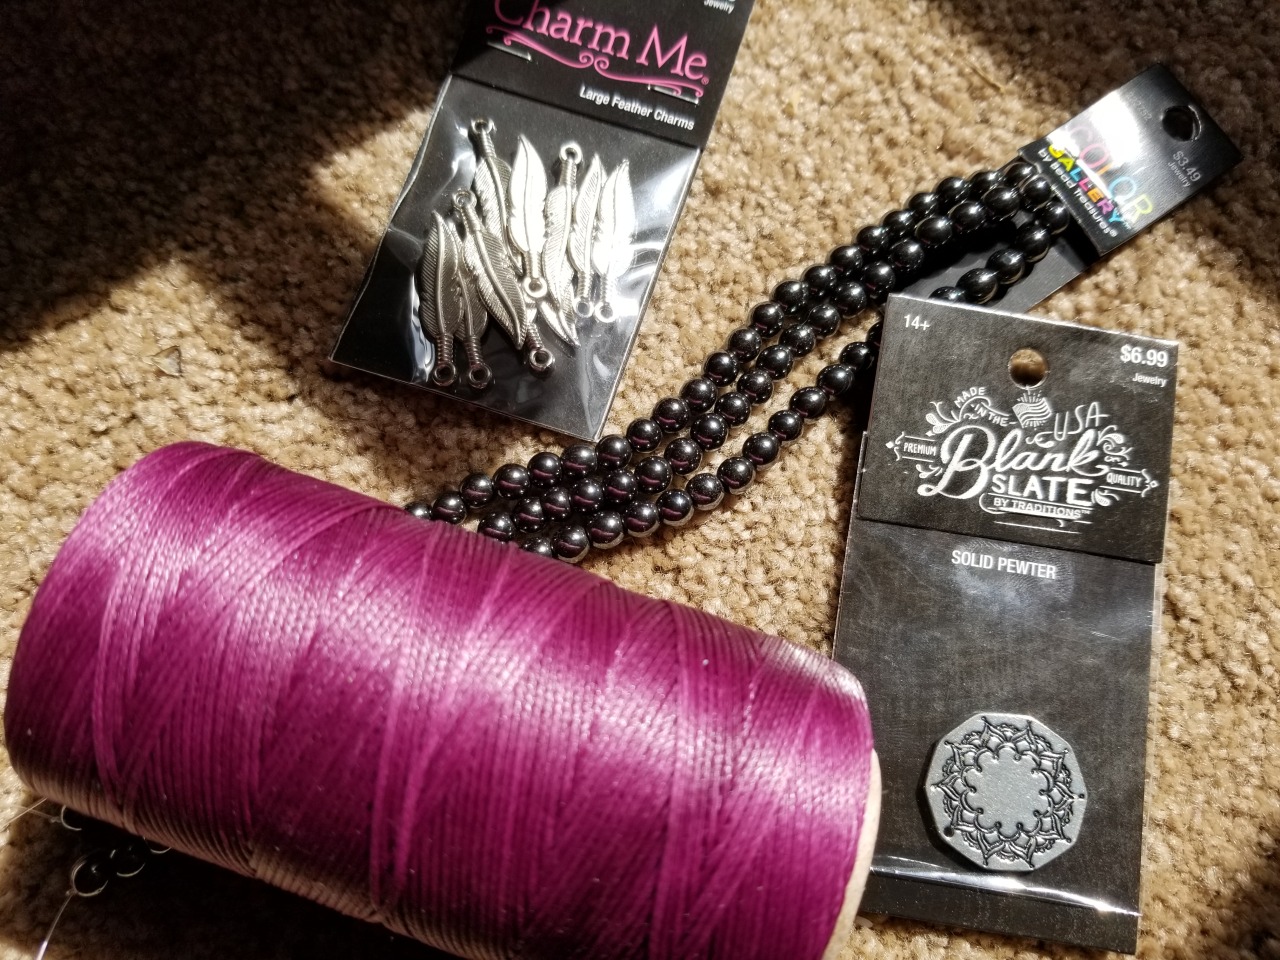
If you want to make one, you’ll need:
About 6 feet of beading string in an appropriately corresponding color to your needs (I went with purple for spirituality and power)
Forty beads (6mm for the sizing to come out like mine; larger or smaller will affect it; I picked hematite mostly for the look, but also to keep me grounded)
Nine feather charms
One end charm (serves as your closeure; something with dimension will work better than the flat disc I chose which likes to slip out now and then)
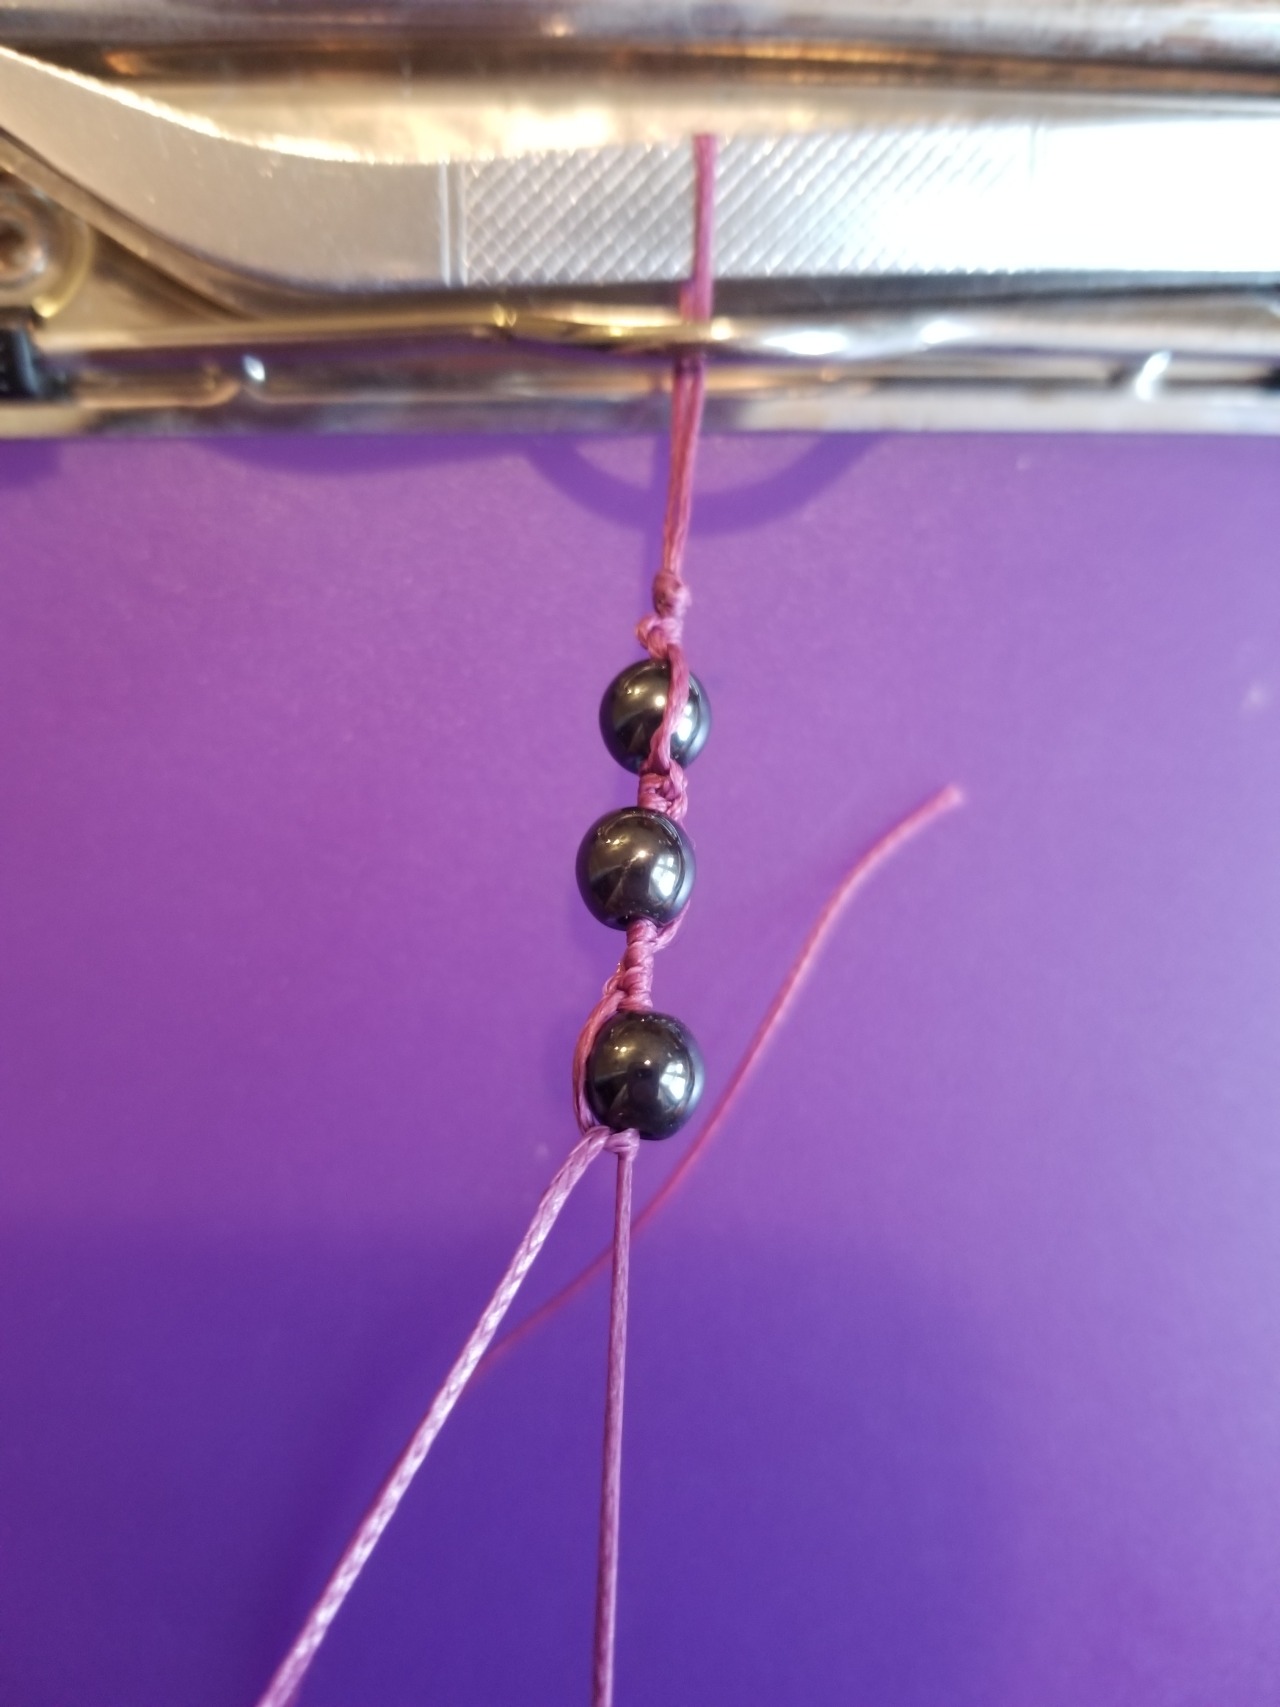
To make your ladder necklace, you’ll have to tie a loop in it in a place so that you have one short strand about two feet long and one long strand of the remainder. The loop will be part of your closeure. Basically, fold your string so one part hangs two feet, and the remainder hangs on the other side. Tie a simple knot in the folded string so you have a loop that’s just big enough for your end charm to slip through with little/no excess.
Find something to affix this to for knotting (I slipped the loop through some tweezers which I then clamped into my clipboard).
Now get to knotting, just like middle school friendship bracelets. As you know, remember to set your intent for the ladder into each knot. Also remember to keep the short strand stationary: use the long strand to make a basic forward knot around the short strand.
Make four knots to establish (4K)
Thread a bead (B), make four knots (4K). This is your basic pattern.
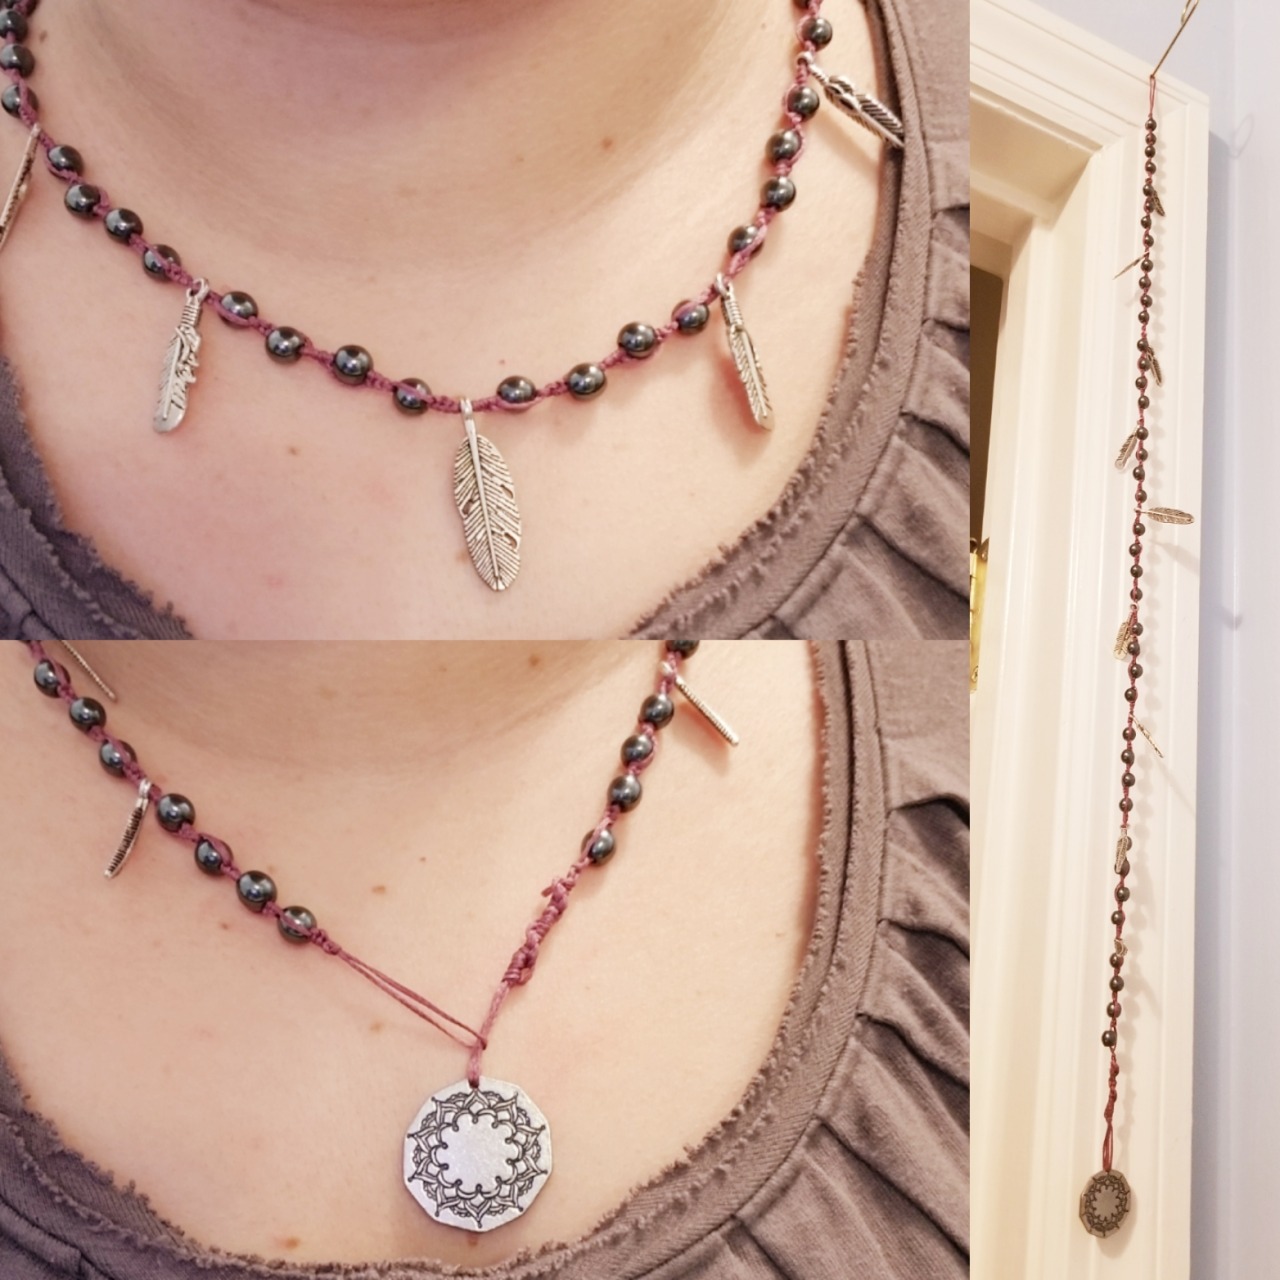
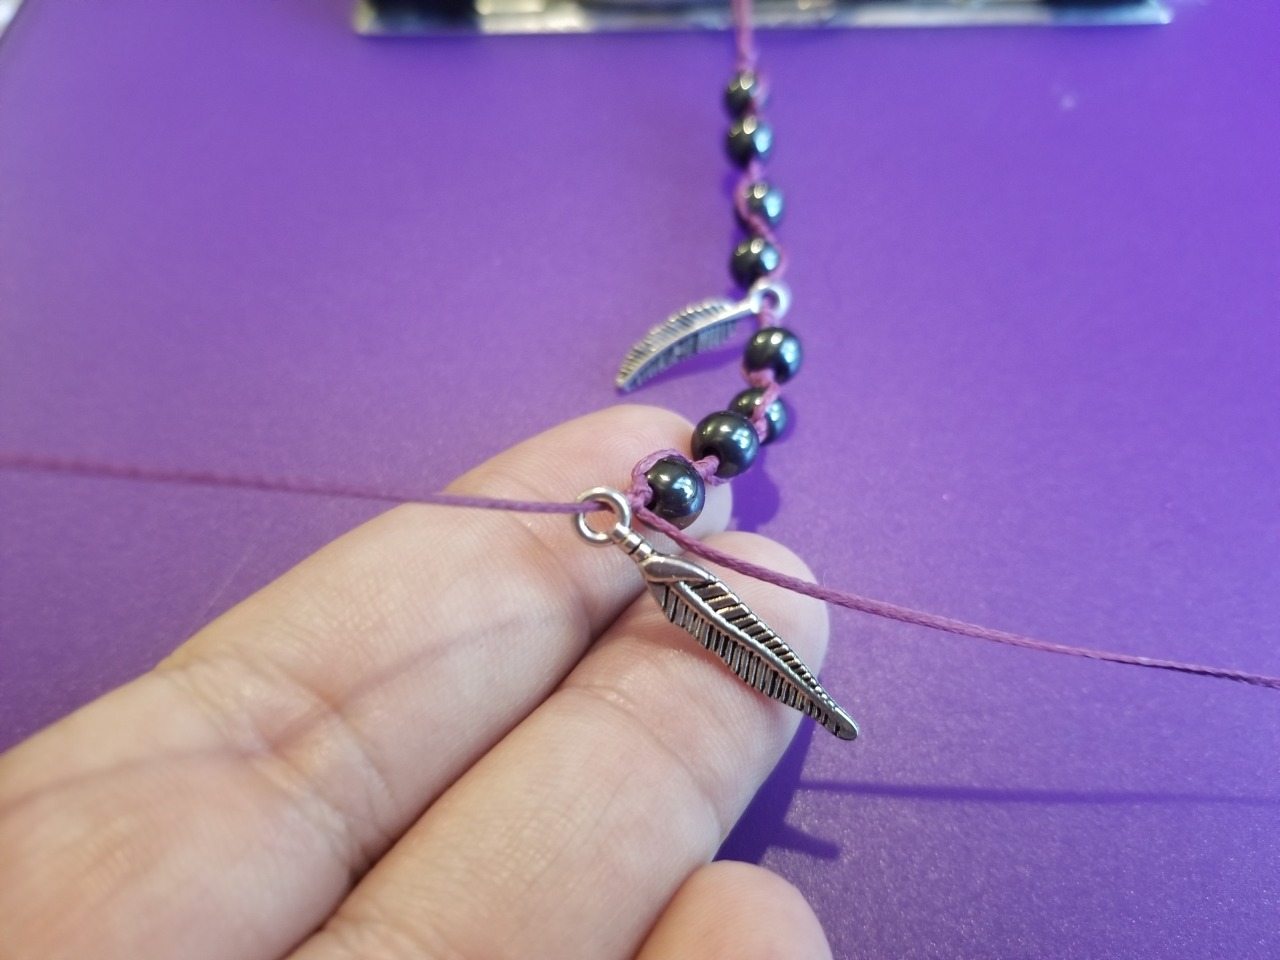
For my ladder, I established a pattern of four beads to each side of each feather charm (F). The pattern runs like so from start to finish: [4K, (B, 4K)x4, F]x9, (4K, B)x4, 4K.
In other words, with four knots between each item, string beads and feather charms in a four-one pattern with nine repeats, then end with an additional four beads.
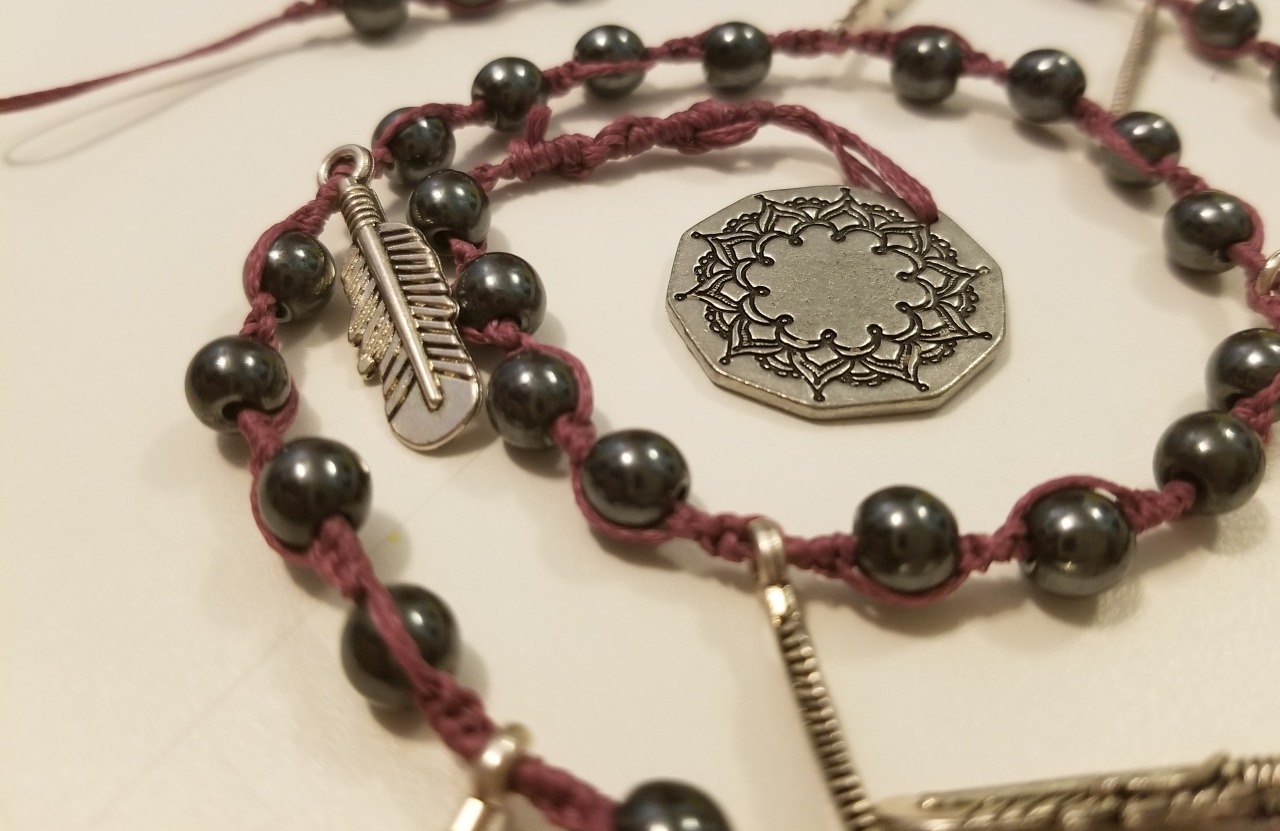
At the end, tie on your final charm using both strands (I used a clinch knot), and trim off the excess string.
Done! Hang it up or wear it for protection. No one needs to know you’re carrying a loaded charm. 😉